Friday, November 22, 2024

How to Make a Small Pallet Shed for Outdoor Equipment and Storage

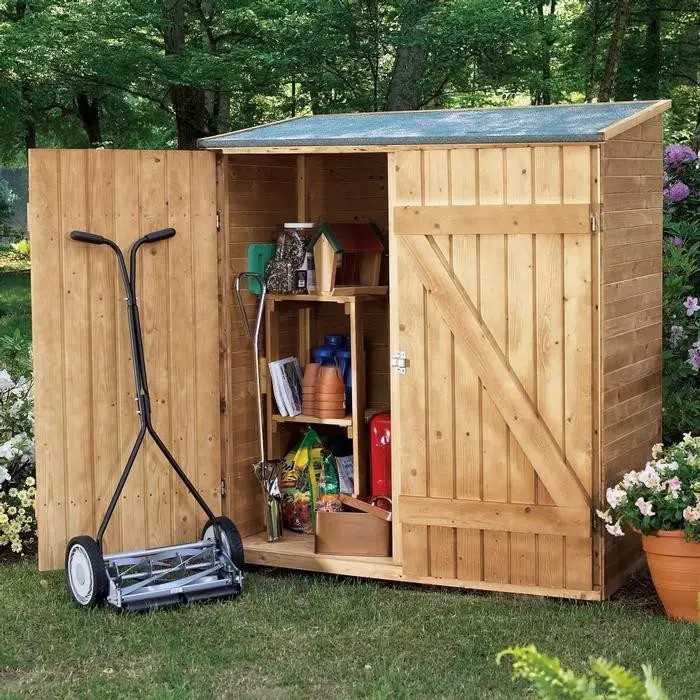
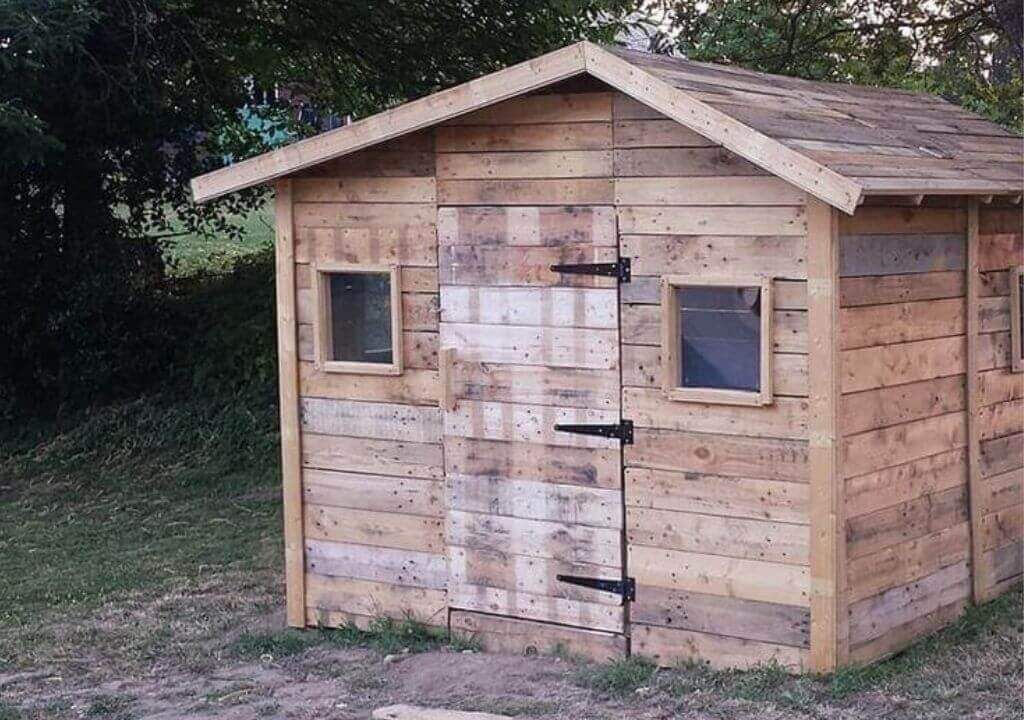
How to Make a Small Pallet Shed for Outdoor Equipment and Storage

Building Your Own Tiny Pallet Shed: A Step-by-Step Guide

Hey there, fellow DIY enthusiasts! So you're thinking about building a small shed, but the thought of lumber costs and complex carpentry is making your eyes glaze over? I get it. That's why I'm here to tell you about a super cool, budget-friendly, and surprisingly sturdy option: a pallet shed! This guide will walk you through the process, from gathering your materials to admiring your handiwork. Let's get started!

1. Planning Your Pallet Paradise: Size and Design

Before you even think about hammering a single nail, you need a plan. The first decision is size. How much stuff do you need to store? A small shed, say 4ft x 6ft, is perfect for garden tools, outdoor cushions, or a small lawnmower. Anything bigger will require more pallets and more effort (but will give you more storage, obviously!).

Choosing Your Palettes

Not all pallets are created equal. You'll want to source sturdy pallets made of heat-treated lumber (look for the HT stamp). Avoid pallets that are visibly damaged, rotted, or have loose boards. Ask around â€" local businesses often have pallets they're happy to get rid of. Just make sure to get permission before collecting them! You'll likely need at least 8-12 pallets for a small shed, depending on your chosen design and size. It’s always better to have a few extra on hand.

Sketching Out Your Design

Grab a pencil, paper, and maybe a ruler. Sketch out the dimensions of your shed. Think about the layout: Will you have a single door? Two doors? Will you need shelves? A simple design is best for beginners. Don't overcomplicate things! Remember, this is a small shed; keep it functional and straightforward. A quick internet search for "pallet shed plans" will provide you with a ton of inspiration â€" look for designs you can adapt to your skill level and available materials.

2. Gathering Your Arsenal: Tools and Materials

You won't need a full-blown workshop to build this shed, but you will need a few essential tools:
  • Hammer
  • Screwdriver (both Phillips and flathead)
  • Measuring tape
  • Level
  • Saw (hand saw or circular saw)
  • Safety glasses
  • Work gloves
  • Nail gun (optional, but highly recommended for speed and ease)
  • Drill (optional, useful for pre-drilling holes)
Besides the pallets, you'll likely need some additional materials:
  • Strong screws: Exterior-grade screws are crucial for durability and weather resistance.
  • Roofing material: Tarps, corrugated metal sheets, or even plywood can work. Consider the climate and weather conditions in your area when making this choice.
  • Optional: Pressure-treated lumber for the base or floor. This adds significantly to the cost, but increases durability.
  • Optional: Exterior-grade paint or sealant to protect the wood.

3. Construction Time! Building Your Pallet Shed

Okay, let's build! This process is highly dependent on your specific design, but here’s a general overview:

Creating the Base

Start by laying down a level base. This could be concrete, compacted gravel, or even just a layer of weed barrier fabric to prevent weeds from growing up inside. This step is critical for preventing rot and keeping your shed stable. You can also build a simple frame out of pressure-treated lumber for a raised floor if you prefer.

Assembling the Walls

Carefully inspect your pallets for any loose nails or splinters. Remove any loose boards or debris. Now, you'll start assembling the walls. This often involves attaching pallets vertically to create sturdy wall sections. Use your screws liberally, aiming for at least two screws per pallet board into the connecting pallets. Make sure the walls are square and plumb (perfectly vertical). Use your level frequently!

Building the Roof

Once your walls are up, you’ll need to create a roof frame. This is where things can get a little more intricate, depending on the type of roof you've chosen (a simple gable roof is easiest). Remember to ensure the roof structure is strong enough to support your chosen roofing material and withstand wind and snow (depending on your climate).

Adding the Roofing Material

Secure your roofing material to the roof frame. Make sure it's weathertight to protect your stored items. If you're using a tarp, make sure it's heavy-duty and properly secured with straps or weights.

Adding the Door

Cut a door opening in one of the walls (or two, if you prefer). You can use additional pallets to create a simple door frame and then hang a door using hinges. Again, you can source reclaimed wood if you have it, or buy inexpensive lumber for this task. You might want to add a simple latch or padlock for security.

Finishing Touches

Once your shed is complete, you can consider adding a coat of weather-resistant paint or sealant to protect the wood from the elements and extend the life of your shed. You can also add shelves inside for better organization.

4. Enjoy Your New Pallet Shed!

Congratulations! You've successfully built your own pallet shed. Now, go fill it with all your outdoor equipment and marvel at your handiwork!

Commonly Asked Questions

How long does it take to build a pallet shed?

The time it takes varies depending on the size and complexity of the design, and your experience level. Expect to spend anywhere from a weekend to a few weekends for a small shed.

How much does it cost to build a pallet shed?

The biggest expense is likely your roofing material. The cost of pallets can vary depending on your location and how you source them. With some resourceful scavenging and planning, you can keep the total cost quite low.

Are pallet sheds durable?

Pallet sheds can be surprisingly durable, particularly when built using sturdy pallets and proper construction techniques. Using pressure-treated lumber for the base or a solid foundation enhances their longevity considerably. Regular maintenance, such as repainting or resealing, will help extend their lifespan.

What are the building codes for pallet sheds?

Building codes vary by location. Before starting your project, check with your local authorities to ensure you meet any relevant requirements. Small sheds often fall under less stringent regulations, but it's always best to check.

Can I use any type of pallet?

No. Only use heat-treated pallets (marked with HT). Avoid using pallets that have been chemically treated (marked with MB) as these can be harmful.

Remember, safety first! Always wear safety glasses and gloves while working, and take your time. Don’t hesitate to ask for help if you’re struggling with any part of the process. Happy building!
Thursday, November 21, 2024

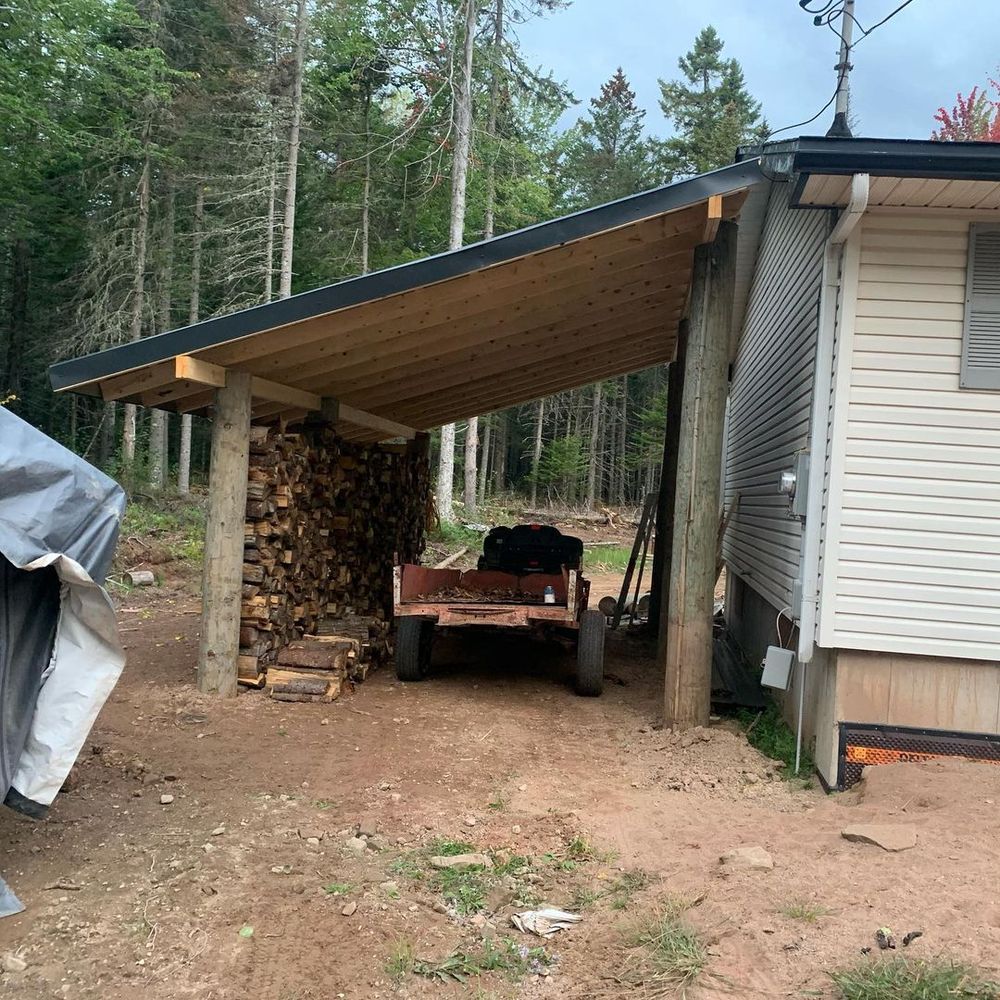
Build a Lean-To Shed for Your Yard: Easy-to-Follow Instructions

Build a Lean-To Shed for Your Yard: Easy-to-Follow Instructions

Building a Lean-To Shed: A Comprehensive Guide

This comprehensive guide provides detailed instructions for constructing a lean-to shed, a versatile and practical addition to any yard. The instructions are designed for individuals with basic carpentry skills and access to common tools. While adhering to safety protocols throughout the project is paramount, this guide aims to provide a clear and detailed pathway to successful shed construction.

Phase 1: Planning and Preparation

Before commencing any construction, meticulous planning is crucial. This phase involves determining the shed's dimensions, selecting appropriate materials, and acquiring necessary permits. Failure to adequately plan can lead to costly mistakes and delays.

1.1 Determining Dimensions and Location

The size of your lean-to shed will be largely determined by your intended use. Consider the items you plan to store and ensure sufficient space for comfortable access. Typical dimensions range from 6ft x 8ft to 10ft x 12ft, but you can adjust these based on your needs. The location should be carefully selected, taking into account factors such as proximity to existing structures, access to utilities, and sunlight exposure. Ensure the chosen location is level and provides adequate drainage to prevent water accumulation around the shed foundation.

1.2 Material Selection

The choice of materials significantly impacts the shed's durability and longevity. Pressure-treated lumber is highly recommended for its resistance to rot and insect infestation, particularly for the foundation and framing. For the roofing, consider asphalt shingles for their affordability and ease of installation, or a more durable metal roofing option for increased longevity. Other essential materials include: concrete blocks or pressure-treated lumber for the foundation, screws, nails, plywood for sheathing, and roofing felt.

Consider the following material specifications:

  • Pressure-treated lumber: 4x4 posts, 2x4 studs, 2x6 rafters
  • Plywood: ½ inch exterior-grade plywood for sheathing
  • Roofing: Asphalt shingles or metal roofing
  • Fasteners: Galvanized nails and screws
  • Foundation: Concrete blocks or pressure-treated 4x4 lumber
  • Other: Roofing felt, sealant, and appropriate safety equipment

1.3 Obtaining Necessary Permits

Check with your local building department to determine if permits are required for your lean-to shed project. Permitting requirements vary depending on location and shed dimensions. Obtaining the necessary permits before starting construction prevents potential legal issues and ensures compliance with local building codes.

Phase 2: Foundation Construction

A stable foundation is essential for a long-lasting shed. This phase involves preparing the ground and constructing a base upon which the shed's frame will rest. Two common foundation types are described below: concrete block and pressure-treated lumber.

2.1 Concrete Block Foundation

This method involves setting concrete blocks in the ground to create a level base. Begin by excavating a trench around the perimeter of your planned shed, ensuring a depth sufficient to accommodate the blocks and provide stability. Level the trench and lay down a layer of gravel for drainage. Then, carefully place the concrete blocks, ensuring they are level and plumb. You may need to use a spirit level and shims to achieve perfect alignment. Once the blocks are set, you can proceed with the framing.

2.2 Pressure-Treated Lumber Foundation

This approach involves using pressure-treated 4x4 lumber as the foundation. Similar to the concrete block method, begin by preparing a level ground. Then, position and secure 4x4 posts at the corners and along the length of the shed's back wall (the wall attached to the existing structure). Use concrete to secure these posts firmly in the ground. Ensure that the posts are plumb and level before proceeding to the next stage. This method is particularly suitable for less-demanding sheds or when working on uneven terrain.

Phase 3: Frame Construction

The frame provides the structural integrity of your shed. This phase involves assembling the walls and roof framework. Accuracy and precision are paramount to ensure the shed's structural soundness.

3.1 Wall Framing

Construct the back wall by attaching 2x4 studs vertically to the foundation posts or blocks. Space the studs according to your chosen sheathing material's specifications (typically 16 inches on center). Ensure the studs are plumb and securely fastened. For the side walls, construct frames similar to the back wall, ensuring proper alignment with the back wall. Use appropriate bracing to maintain the frame’s squareness throughout the process. Proper bracing is crucial to prevent warping and ensure structural stability.

3.2 Roof Framing

The roof framing involves constructing rafters that will support the roofing material. The rafters should be 2x6 lumber or larger depending on the shed's size and local building codes. Cut the rafters to the appropriate length, ensuring they are equally spaced and properly angled to achieve the desired roof pitch. Attach the rafters to the top plates of the back and side walls using appropriate nails or screws. Utilize a rafter square and level to guarantee accuracy in the angle and spacing of the rafters.

Phase 4: Sheathing and Roofing

This phase involves covering the frame with plywood sheathing and installing the chosen roofing material. Careful attention to detail in this stage ensures weatherproofing and aesthetic appeal.

4.1 Sheathing

Attach exterior-grade plywood sheathing to the wall frames. Ensure proper alignment and spacing, and secure the sheathing with nails or screws. Apply weather sealant around windows and doors to prevent drafts and leaks.

4.2 Roofing

Install roofing felt over the rafters to provide a waterproof barrier before installing the roofing material. Then, carefully install the chosen roofing material (asphalt shingles or metal roofing) according to the manufacturer's instructions. Ensure proper overlapping and secure fastening for a leak-proof roof.

Phase 5: Finishing Touches

This final phase involves adding the finishing touches to your new lean-to shed, enhancing its functionality and aesthetics.

5.1 Door and Window Installation

Install any doors and windows, ensuring proper sealing to prevent drafts and water leaks. Use appropriate hardware and follow the manufacturer’s instructions for installation.

5.2 Exterior Finishing

Apply a weather-resistant sealant to all joints and seams to ensure protection against the elements. Consider adding a coat of paint or stain to enhance the aesthetic appeal and protect the wood from weathering.

Disclaimer: This guide provides general instructions for building a lean-to shed. Always consult local building codes and regulations before starting any construction project. Use appropriate safety equipment and techniques throughout the construction process. Seek professional help if you are unsure about any aspect of the construction process.

Step-by-Step Lean-To Shed Build: Create a Reliable Shed for Your Tools

Step-by-Step Lean-To Shed Build: Create a Reliable Shed for Your Tools

Step-by-Step Lean-To Shed Build: Create a Reliable Shed for Your Tools

Constructing a lean-to shed provides a practical and cost-effective solution for additional storage space. This comprehensive guide outlines the meticulous process of building a sturdy and reliable lean-to shed, suitable for housing various tools and equipment. The instructions are designed for a novice builder with some basic carpentry skills, emphasizing safety and precision throughout the construction process. Careful planning and attention to detail are crucial for a successful outcome.

Phase 1: Planning and Preparation

Before commencing construction, thorough planning and preparation are paramount. This phase involves several key steps that will lay the foundation for a successful build.

Site Selection and Design

The first consideration is selecting a suitable location for your lean-to shed. The chosen site must be level and provide adequate access for construction materials and future use. Consider proximity to power sources if you anticipate using electrically powered tools within the shed. The design should complement the existing structures, ensuring it doesn't obstruct access or compromise aesthetics. Sketching a preliminary design, including dimensions and materials, is highly recommended.

Material Selection and Acquisition

The choice of materials significantly impacts the shed's durability and longevity. Pressure-treated lumber is strongly recommended for its resistance to rot and insect infestation. Specify the dimensions required, considering the shed's intended size and load capacity. Obtain necessary hardware, including screws, nails, and possibly metal brackets, from a reputable supplier. Ensure all materials are adequately protected from the elements before construction commences.

Essential materials typically include:

  • Pressure-treated lumber for the frame (4x4 posts, 2x4s, 2x6s for rafters and supports)
  • Plywood or OSB sheathing for the walls and roof
  • Roofing material (e.g., asphalt shingles, metal roofing)
  • Concrete blocks or a suitable foundation base
  • Screws, nails, and other fasteners
  • Weatherproofing sealant
  • Level, measuring tape, saw, hammer, drill, and other necessary tools

Permits and Regulations

Check local building codes and regulations to determine if a permit is required for the construction of your lean-to shed. This step is crucial to avoid potential legal issues and ensure the structure complies with all safety standards. Obtain any necessary permits before commencing construction.

Phase 2: Foundation and Framing

This phase focuses on creating a solid foundation and erecting the frame for your lean-to shed. Accuracy and precision are paramount to ensure stability and longevity.

Foundation Construction

A robust foundation is essential for supporting the weight of the shed. For a lean-to shed, a concrete slab foundation or a simpler base of pressure-treated 4x4 posts set in concrete footings is usually sufficient. Ensure the foundation is level and firmly set. For the post foundation, carefully measure and mark the positions of the posts to ensure the lean-to is properly aligned with the supporting structure.

Framing the Walls and Roof

The framing process involves erecting the supporting structure for the walls and roof. Begin by constructing the wall frames using pressure-treated lumber. Ensure the framing is plumb and square, using a level and measuring tape to verify dimensions at each stage. For the roof, the rafters should be appropriately sized and spaced to support the chosen roofing material and expected snow load. Use appropriate connectors and fasteners to secure the framing elements.

Important considerations for framing:

  • Use a level to ensure all framing members are plumb and square.
  • Pre-assemble wall and roof sections for easier installation.
  • Securely fasten all joints with appropriate screws and connectors.
  • Ensure adequate overhang for the roof to prevent water damage.

Attaching to Existing Structure

Securely attach the lean-to shed to the existing structure using appropriate fasteners and methods. This is crucial to ensure the stability and longevity of the shed. The attachment method will depend on the material of the existing structure. Ensure the attachment doesn’t compromise the structural integrity of the existing building.

Phase 3: Sheathing, Roofing, and Finishing

This phase completes the shed's construction, adding the exterior sheathing, roofing, and finishing touches.

Sheathing the Walls and Roof

Apply plywood or OSB sheathing to the exterior walls and roof. Ensure the sheathing is properly aligned and securely fastened to the framing. Use appropriate nails or screws, ensuring they are driven flush with the surface to avoid protruding points. Properly seal all joints and seams to prevent water infiltration.

Installing the Roofing Material

Install the chosen roofing material according to the manufacturer's instructions. Ensure the roofing material is properly aligned and securely fastened. Pay attention to details like flashing around vents and edges to prevent water leaks. Consider using underlayment beneath the roofing material for additional protection.

Finishing Touches

Apply any necessary finishing touches, such as adding trim, installing a door and windows (if desired), and painting or staining the exterior. Seal any exposed wood surfaces to protect them from the elements. Consider adding weatherstripping around doors and windows to improve insulation and prevent drafts.

Phase 4: Inspection and Completion

Once construction is complete, a final inspection is crucial to ensure all aspects meet the required standards and functionality.

Final Inspection and Adjustments

Conduct a thorough inspection of the completed shed, checking for any structural issues, loose fasteners, or gaps that may compromise the shed's integrity. Make any necessary adjustments or repairs before proceeding to the next step.

Clean-Up and Disposal

Remove all debris and construction waste from the construction site, disposing of materials responsibly and in accordance with local regulations. Ensure the surrounding area is clean and tidy.

Building a lean-to shed is a rewarding project that can significantly enhance your property. By carefully following these steps and prioritizing safety and precision, you can successfully create a durable and reliable storage solution for your tools and equipment. Remember that consulting with experienced builders or referring to detailed construction manuals can further enhance your understanding and ensure a successful project.

How to Build a Pallet Shed on a Budget: Simple and Affordable Plans

How to Build a Pallet Shed on a Budget: Simple and Affordable Plans

Build a Pallet Shed on a Budget: Simple and Affordable Plans

Dreaming of extra storage space without breaking the bank? A pallet shed is the perfect solution! This guide provides simple, affordable plans to help you build a sturdy and functional shed using reclaimed pallets. Forget expensive building materials; let's repurpose and save!

Planning Your Pallet Shed

Before you dive into construction, careful planning is crucial. First, determine the size of your shed based on your storage needs and available space. Consider the dimensions of the pallets you'll be using â€" this will significantly influence your shed's overall size and design. Next, choose a location that's level, well-drained, and easily accessible. Check local building codes and regulations to ensure your shed complies with all requirements. Finally, gather your materials. Besides pallets, you'll need things like screws, nails, wood for framing (if needed), a roof covering (tarpaulin, corrugated metal sheets, or even more pallets!), and possibly concrete blocks or a simple foundation.

Sourcing and Preparing Your Pallets

The heart of your budget-friendly shed lies in the pallets. Source your pallets responsibly. Look for free pallets from local businesses, construction sites, or online classifieds. Remember to inspect each pallet carefully for rot, pests, or damage. Clean the pallets thoroughly. Remove any nails that protrude or are loose to avoid injury. You might need a wire brush, a hammer, and possibly even a pressure washer for stubborn dirt and grime. Consider treating the wood with a sealant or wood preservative to enhance durability and protect against the elements. This step isn't strictly necessary but significantly extends the life of your shed.

Constructing the Pallet Shed Frame

Building the frame is straightforward. You can use the pallets directly as walls, creating a rustic look, or you might need additional framing lumber to strengthen the structure, particularly if your shed is larger or you plan to store heavy items. Start with the base â€" this could be simply laying pallets on the ground or using concrete blocks for a slightly raised and more stable foundation. Then, assemble the walls. Connect the pallets using screws or strong nails, ensuring they're firmly attached to each other and to any additional framing. Consider adding bracing for added stability, particularly for taller sheds.

Adding Roof Support

The roof is a crucial part of your shed's functionality. You will need to add support beams to hold the roof covering. This can be done using additional lumber or even more pallets, depending on your design. Consider using a simple gable roof or a more complex design if your carpentry skills allow. Make sure the roof is strong enough to withstand local weather conditions.

Completing Your Pallet Shed

Once the frame is complete, it's time to add the finishing touches. Install your chosen roof covering, ensuring it's securely fastened to protect your belongings. You might want to add a door for easy access â€" this can be constructed from additional pallets or purchased separately. Consider adding ventilation to prevent moisture build-up, which can lead to rot and damage. This could be as simple as leaving small gaps between pallets or installing small vents. Finally, consider adding a floor if you desire a clean and dry interior. This can be made from plywood, OSB, or even more pallets.

Tips for Success

  • Plan your design meticulously before starting.
  • Source high-quality pallets in good condition.
  • Use appropriate safety gear throughout the project.
  • Don't hesitate to ask for help if needed.
  • Enjoy the process of creating something unique and useful!

Building a pallet shed is a rewarding project that combines creativity, resourcefulness, and significant cost savings. With careful planning and execution, you can create a durable and functional storage solution that perfectly fits your needs and budget.

Free Pallet Shed Plans: Build a Shed for Your Garden with Recycled Pallets

Free Pallet Shed Plans: Build a Shed for Your Garden with Recycled Pallets

Free Pallet Shed Plans: Build a Garden Shed with Recycled Pallets

Tired of overflowing garden clutter? Wish you had a dedicated space to store tools and supplies, but don't want to break the bank? Then build your own pallet shed! This surprisingly simple project uses readily available, recycled materials, saving you money and reducing waste. Forget expensive lumber and complex designs; this guide provides free plans to construct a functional and attractive garden shed using reclaimed pallets.

Assessing Your Needs and Materials

Before you dive into construction, plan your shed's dimensions and location. Consider the size of your garden and the amount of storage you need. A smaller shed might suffice for basic tools, while a larger one accommodates more equipment and supplies. Choose a level, well-drained spot, ideally near a power source if you plan on using electric tools inside. You'll need a significant number of palletsâ€"the quantity depends on the size of your planned shed. Inspect each pallet carefully; choose sturdy, undamaged ones free of rot or significant damage. You'll also need additional supplies such as screws, nails, a hammer, a drill, and possibly a saw (depending on the pallet sizes and your desired shed dimensions). Remember safety gear: wear gloves, safety glasses, and sturdy work boots throughout the entire project.

Preparing the Pallets

Once you've gathered your pallets, prepare them for construction. This crucial step ensures the longevity and stability of your shed. Begin by thoroughly cleaning each pallet, removing any dirt, debris, or loose wood. Inspect for any protruding nails or staples and carefully remove or hammer them down flush to the surface to prevent injuries during construction. If the pallets are treated with chemicals (check for markings), consider sealing them with a weatherproof sealant to protect them and prevent any chemical leaching. This step is essential, especially if you intend to store food or other sensitive items in the shed.

Disassembling and Reconfiguring (Optional)

Depending on the size and condition of your pallets, you may choose to disassemble them and reconstruct the shed with individual boards. This allows for greater design flexibility and ensures consistent spacing and structural integrity. However, if the pallets are in excellent condition, you may be able to use them whole, significantly reducing construction time.

Constructing the Shed Frame

This stage involves creating the shed's basic structure. Using sturdy pallets as the foundation, begin by assembling the base using the chosen configuration (whole or disassembled pallets). Secure the base with screws and ensure it's level. Construct the walls using pallets, making sure to secure each one tightly to the base and to each other. This will ensure a stable structure capable of resisting weather conditions. Remember to leave space for a door and any windows you wish to incorporate. You can achieve this by carefully cutting sections from your pallets or strategically omitting them during construction.

Adding the Roof and Finishing Touches

The roof is a critical element, providing protection from the elements. You can construct a simple gable roof using additional pallets or salvaged wood. Secure the roofing material (such as tar paper or corrugated metal) to the frame to ensure watertightness. Add a door using reclaimed wood or a repurposed door. Consider adding hinges and a latch for security. For added aesthetics and protection, apply a sealant or paint to the exterior of the shed. You can personalize the shed further by adding shelves, hooks, or other organizational elements.

Safety First!

Always prioritize safety. Wear appropriate protective gear, follow instructions carefully, and seek help if needed. If working with power tools, ensure you have the proper knowledge and training before operating them. Improper use of tools can lead to serious injury.

Building a pallet shed is a rewarding project that blends practicality with environmental consciousness. With careful planning and execution, you can create a valuable addition to your garden, all while utilizing recycled materials and saving money. Enjoy the process and the satisfaction of creating something useful from reclaimed resources!

How to Build a Pallet Shed: Easy DIY Plans for a Functional Storage Shed

How to Build a Pallet Shed: Easy DIY Plans for a Functional Storage Shed

How to Build a Pallet Shed: Easy DIY Plans for a Functional Storage Shed

Hey there, fellow DIY enthusiasts! So you're thinking about building a shed, huh? That's awesome! But maybe the price tag of a pre-built shed is a little… intimidating. Well, guess what? You can totally build a fantastic, functional storage shed yourself, and for a fraction of the cost, using reclaimed pallets! This guide will walk you through building a pallet shed, step-by-step, in a way that's easy to understand, even if you're a total newbie to construction. Let's get started!

Planning Your Pallet Shed

Before you even think about hammering a nail, you need a plan. This isn't rocket science, but a little forethought goes a long way.

Choosing Your Pallets

This is arguably the most important step. You'll need to source your pallets. Important Note: Not all pallets are created equal. Some are treated with chemicals (like methyl bromide) that aren't good for the environment or your health. Look for pallets stamped with "HT" (heat treated) â€" these are safe to use. Also, consider the condition of the pallets. You'll want ones that are relatively sturdy and free of major damage. You'll probably need between 15-25 pallets depending on the size of your shed. Hit up local businesses â€" construction sites, lumber yards, and even grocery stores â€" they often have pallets they're happy to get rid of.

Designing Your Shed

Think about the size and shape you want. A simple rectangular shed is the easiest to build. Consider:
  • Size: How much storage space do you need? A small shed might only require a few pallets, while a larger one will require significantly more.
  • Location: Make sure you have a level spot to build on and check local building codes and regulations.
  • Door placement: Where will the door be located? Consider accessibility and ease of use.
  • Roof design: A simple gable roof (two sloping sides) is relatively easy to construct.

Gathering Your Tools and Materials

Besides the pallets themselves, you’ll need a few essential tools and materials:
  • Hammer
  • Screwdriver (both Phillips and flathead)
  • Measuring tape
  • Level
  • Circular saw or hand saw (for cutting pallets if needed)
  • Safety glasses and gloves
  • Nails or screws (galvanized are best for outdoor use)
  • Plywood or OSB (for roofing and flooring, if needed)
  • Roofing felt or other weatherproofing material
  • Optional: Paint or sealant for added protection

Building Your Pallet Shed: A Step-by-Step Guide

Alright, let’s get building! Remember, safety first! Always wear safety glasses and gloves.

Step 1: Preparing the Pallets

Carefully inspect each pallet for loose boards, nails, or damage. Remove any loose boards or protruding nails. If you need to cut pallets to fit your design, use a saw and take your time for a clean cut.

Step 2: Building the Base

Lay your first layer of pallets on the ground, ensuring they are level and evenly spaced. You can create a simple base by using a layer of pallets directly on the ground or construct a more elevated base by using concrete blocks or pressure treated lumber. Secure the pallets together using screws or nails.

Step 3: Building the Walls

Stack your pallets on top of the base to form the walls. Make sure they are straight and aligned. You might need to cut or adjust some pallets to fit perfectly. Secure the pallets together using screws or nails. For added strength, consider using corner bracing.

Step 4: Constructing the Roof

This depends on your chosen roof design. For a simple gable roof, you’ll need to create roof trusses. These are essentially triangular frames that support the roofing material. You can use extra pallets for this, or you can purchase pre-made trusses. Once the trusses are in place, cover them with plywood or OSB and add roofing felt or other weatherproofing material.

Step 5: Adding the Door

You can create a door using pallets or purchase a pre-made door to fit your opening. Ensure the door hangs correctly and is properly secured.

Step 6: Finishing Touches

Once the main structure is complete, add any finishing touches you desire. You can paint or stain your shed to protect the wood and add a bit of personal style. Consider adding a floor (using plywood or OSB) for added protection from moisture.

Tips and Tricks for Success

  • Plan ahead: Measure twice, cut once! Careful planning saves time and materials.
  • Use sturdy pallets: Don't skimp on the quality of your pallets. A stronger base means a more durable shed.
  • Pre-drill holes: This prevents the wood from splitting when you're hammering or screwing.
  • Work with a friend: Having an extra pair of hands makes the job much easier and faster.
  • Take your time: Don't rush the process. A well-built shed will last much longer.

Frequently Asked Questions

Q: How long does it take to build a pallet shed?

The time it takes depends on the size and complexity of your shed, as well as your experience level. A small, simple shed could be built in a weekend, while a larger, more complex shed might take several weekends.

Q: How much does it cost to build a pallet shed?

The cost is primarily determined by the price of any additional materials you need (plywood for the roof, screws, etc.). The pallets themselves are often free or very inexpensive, making this a very budget-friendly project.

Q: What kind of permits do I need?

This depends on your local building codes and regulations. Some areas may require permits for any structure built on your property. It's best to check with your local building department before you begin construction.

Q: How durable is a pallet shed?

A well-built pallet shed can be surprisingly durable, especially if you use high-quality pallets and add weatherproofing. However, it won't last as long as a professionally built shed made from pressure-treated lumber.

Q: Can I use pallets from different sources?

Yes, but make sure they are all heat treated (HT) for safety and consistency. Also check them thoroughly for damage and any potential issues before using them.

There you have it! Building a pallet shed is a rewarding project that can save you a significant amount of money. Remember to always prioritize safety and take your time. Happy building!

Step-by-Step Guide to Building a Wood Pallet Shed from Recycled Materials

Step-by-Step Guide to Building a Wood Pallet Shed from Recycled Materials

Building Your Dream Shed: A Step-by-Step Guide Using Recycled Pallets

Tired of overflowing garages and cluttered yards? Dreaming of a charming, functional shed without breaking the bank? This guide shows you how to build a sturdy and stylish shed entirely from recycled wood pallets, transforming discarded materials into a valuable addition to your property. Get ready to unleash your inner builder and embrace the rewarding experience of creating something beautiful from practically nothing!

Planning and Preparation: Laying the Foundation for Success

Before diving into the construction, careful planning is crucial. This isn't just about throwing pallets together; we're building a structure that will last. First, determine your shed's dimensions. Consider the space you have available and the items you'll store. Sketch a simple design, noting door placement, window locations (if desired), and overall height. Remember to check local building codes before you start, ensuring your shed complies with regulations.

Gathering Your Materials: A Treasure Hunt for Recycled Riches

Now for the fun part: sourcing your materials! Locate free or inexpensive wood pallets. Inspect them carefully; select sturdy pallets with minimal damage. You'll need a significant number, depending on your shed's size. Beyond pallets, you'll need additional materials, including:

  • Strong screws and a drill: Choose exterior-grade screws for lasting durability.
  • Hammer and nails (optional): For extra reinforcement or if you prefer a mixed approach.
  • Measuring tape and level: Essential for accurate construction.
  • Saw (circular saw recommended): For cutting pallets to size. Safety glasses are a must!
  • Post hole digger or shovel (for a ground-level shed): To create holes for your base supports.
  • Concrete mix (for a ground-level shed): To secure your base.
  • Roofing material: Tarps, corrugated metal, or recycled shingles work well.
  • Optional: Paint or stain to enhance the aesthetics of your shed.

Construction: Bringing Your Pallet Shed to Life

With your materials gathered and your plan finalized, the construction begins! We'll start with the foundation, then build the walls and roof.

Building the Foundation: A Stable Base for Your Creation

For a ground-level shed, dig holes and set sturdy posts in concrete. Ensure the posts are level and plumb. For a raised shed, build a simple platform using additional pallets or treated lumber. This provides better ground clearance and protection from moisture.

Constructing the Walls: Assembling the Pallet Panels

Begin assembling your pallet walls. You might need to cut some pallets to fit your dimensions. Use screws to connect the pallets securely, creating sturdy panels. Pay attention to the alignment, ensuring the walls are straight and even. Consider adding extra bracing for strength, especially in areas subject to higher stress.

Raising the Walls and Attaching the Roof: The Final Touches

Carefully lift and position your pallet wall panels onto the foundation. Secure them firmly to the posts. Now, construct your roof using additional pallets, potentially cutting them to angle appropriately for shedding rain. Secure the roofing material over the pallet framework; consider adding extra reinforcement if necessary. Remember to always prioritize safety when lifting and working at heights!

Finishing Touches and Enjoyment: Revel in Your Recycled Masterpiece

Once the structure is complete, add a door (consider using a repurposed door or creating one from more pallets), and perhaps a window if desired. Apply paint or stain to protect the wood and enhance its appearance. Finally, step back and admire your incredible, eco-friendly pallet shed! Enjoy the satisfaction of having built something functional and beautiful from recycled materials, saving money and reducing waste.

Remember, safety first! Always wear appropriate safety gear, including safety glasses and gloves, throughout the entire construction process. This project involves power tools and potential hazards; take precautions and work at your own pace. Happy building!